

Last updated: October 2026
Key takeaway:Realtor branding photos combine headshots, lifestyle portraits, work-in-action scenes, and optional short videos to present a consistent professional identity. A well-planned session can give a Maple Ridge or Metro Vancouver realtor a useful library for a website, listing presentations, social media, email, and print materials.
Realtor branding photos are more than an updated profile picture. They show prospective clients what it feels like to work with you: how you communicate, where you work, which communities you know, and how confidently you guide a transaction.
Silver Valley Studios Inc. is based in Maple Ridge and creates photography and video content for realtors, businesses, and property professionals across British Columbia. The process combines planning, location selection, wardrobe guidance, photography, and social-first delivery so the final library is practical rather than a collection of disconnected poses.
What do realtor branding photos include?
A branding session normally includes several types of images that can be used together across your marketing. The exact mix depends on your audience, services, personality, and the places where you meet clients.
- Professional headshots: clean vertical and horizontal portraits for profiles, email signatures, biographies, and listing presentations.
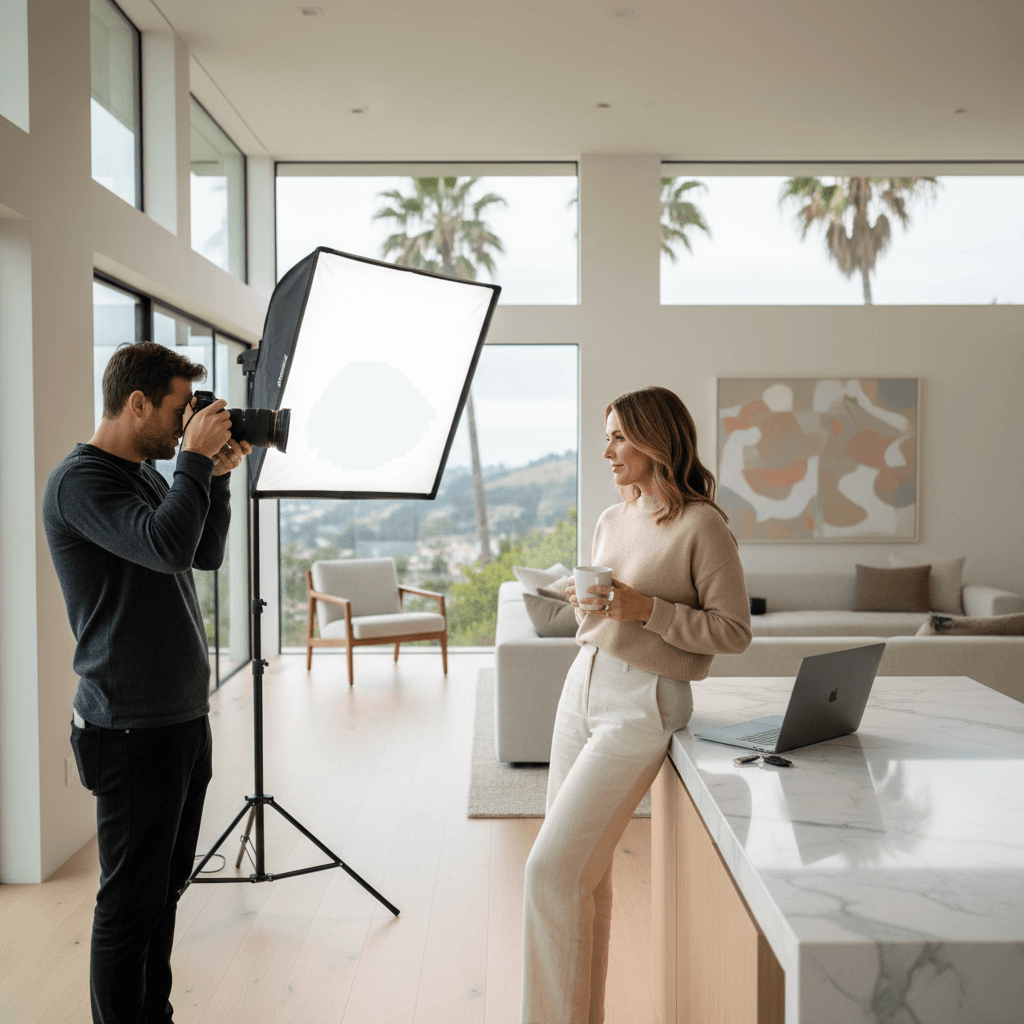
- Lifestyle portraits: natural scenes such as reviewing notes, having coffee, walking through a neighbourhood, or preparing for a meeting.
- Environmental portraits: images that place you in a recognizable office, street, building lobby, or community setting.
- Work-in-action details: hands using a tablet, preparing a listing package, opening a door, checking a floor plan, or reviewing a checklist.
- Short vertical clips: simple walking, greeting, property-preparation, and detail footage for social posts and video editing.
This broader approach answers more questions than a single headshot. It gives your audience visual evidence of your role while keeping your face and style recognizable across different channels.
How are branding photos different from realtor headshots?
A headshot is usually designed to show what you look like clearly and professionally. A branding session has a wider purpose: it creates a visual library that shows how you work, who you serve, and how your personality fits your real estate practice.
| Consideration | Headshot session | Branding session |
|---|---|---|
| Main purpose | Update a profile or professional portrait | Create a varied library for ongoing marketing |
| Typical setting | One studio or simple location | Two or three planned settings |
| Visual range | Several expressions and compositions | Headshots, lifestyle, environmental, and detail images |
| Marketing use | Profile, biography, email signature | Website, social media, presentations, email, print, and video |
| Planning needs | Basic wardrobe and background planning | Message, locations, outfits, shot list, crops, and content uses |
If you only need a new profile image, a headshot may be enough. If you want visuals for several months of communication, a branding session is usually the more useful format because the images are created for different situations from the beginning.
How should you plan realtor branding photos?
Start with the people you want to reach and the impression you want them to take away. A first-time buyer may respond to approachable, explanatory images, while a luxury or development-focused practice may need more architectural settings and polished environmental portraits.
1. Define the message before choosing poses
Write one or two sentences describing who you help, where you work, and what clients can expect from you. This message guides the locations, props, wardrobe, and actions included in the shoot.
For example, an agent serving families may need welcoming neighbourhood and home-preparation scenes. An agent working with investors or condo buyers may prefer images involving market research, building amenities, floor plans, and concise client meetings.
2. Choose locations that support your work
Two or three locations can provide variety without making the session feel rushed. A practical combination may include a home office or listing interior, a professional meeting setting, and an outdoor location connected to the community you serve.
Choose places for their meaning as well as their appearance. Check access, permission, parking, noise, weather backup, and the time needed to move between locations. A visually attractive location that creates logistical delays may produce fewer useful images than a simpler location close by.
3. Build a shot list around marketing uses
A shot list keeps the session focused and reduces the chance of receiving many similar portraits. Organize it by use rather than by camera pose.
- Website: a wide hero image with negative space, an About page portrait, and a friendly contact-page image.
- Social media: vertical portraits, walking scenes, detail frames, and images with room for text overlays.
- Listing presentations: confident seated or standing portraits and work-in-action images.
- Email and newsletters: horizontal banners, approachable desk scenes, and seasonal community images.
- Video: walking, greeting, reviewing documents, opening doors, and other simple movements that can be edited into short clips.
A useful session may produce dozens of final images, but the goal is not a number by itself. The goal is enough variety in orientation, expression, distance, and context to support the places where you actually market your services.
4. Prepare outfits and props with restraint
Bring several coordinated looks rather than a completely different style for every scene. A practical selection might include business formal, smart casual, seasonally appropriate outerwear, and one more relaxed option.
Neutral foundations are easy to reuse, while one brand colour or textured layer can add distinction. Avoid very small patterns, distracting logos, reflective accessories, and anything that requires constant adjustment. A lint roller, steamer, spare buttons, and comfortable walking shoes are useful additions.
Props should explain an action rather than decorate the frame. Keys, a tablet, notebook, folder, coffee, phone, or property documents can support a real work moment when used naturally. Keep private client information and confidential documents out of view.
What happens during a realtor branding session?
A structured workflow helps create variety while keeping the session comfortable. Silver Valley Studios Inc. typically begins with a planning conversation and then develops the shoot around the realtor’s message, locations, wardrobe, and intended uses.
- Planning conversation: discuss audience, services, brand tone, preferred images, locations, and practical constraints.
- Visual plan: organize the shot list into headshots, lifestyle scenes, environmental portraits, details, and optional video.
- Location preparation: confirm access, light, travel time, weather alternatives, and any permission requirements.
- Wardrobe review: check colour, fit, layers, accessories, and how each look supports the planned setting.
- Portrait sequence: begin with straightforward portraits before moving into more active or conversational scenes.
- Movement and details: capture walking, working, greeting, property-preparation, and close-up frames for variety.
- Selection and delivery: edit the strongest images and organize files by intended use and orientation.
Small changes in angle, distance, hand position, and expression can create useful variety without requiring a new location for every image. The photographer should also leave time for natural pauses so the final set does not look overly staged.
Which photo and video formats should realtors request?
Ask for formats that match the places you publish. Vertical images are useful for mobile-first social posts, horizontal images work well for website banners and presentations, and square crops can still be convenient for selected profiles or graphics.
- Vertical photography: useful for portrait posts, mobile stories, and many social placements.
- Horizontal photography: useful for website headers, email banners, presentations, and wider layouts.
- Square-friendly compositions: helpful when a profile or platform crops images tightly.
- Vertical video: useful for short-form posts, transitions, introductions, and behind-the-scenes clips.
- Wide video: useful when the same footage may be used on a website or in a presentation.
It is better to discuss intended crops before the shoot than to crop every image after delivery. Tell the photographer where text, buttons, logos, or calls to action may appear so important details are not placed at the edge of the frame.

How can Maple Ridge realtors make branding photos feel local?
Local branding works best when it reflects the places and routines that genuinely connect to your service area. For a Maple Ridge realtor, that might mean combining an office or home interior with a community setting, a walkable streetscape, or another location that fits the clients and neighbourhoods they serve.
Outdoor sessions need a practical weather plan. Schedule flexible scenes around available daylight, keep an indoor alternative ready, and consider how rain, shade, seasonal foliage, and changing temperatures affect wardrobe and equipment. The same planning applies when a session extends to nearby service areas such as Langley, Surrey, or Coquitlam: use locations that are relevant to the agent’s actual practice rather than adding places only for visual variety.
Recognizable local details should support the story without making every image dependent on a landmark. A community-oriented portrait, a work scene, and a clean professional headshot will usually remain useful longer than a set where every frame contains a highly specific background.
What should realtors check before publishing branded images?
Branding photos often appear beside names, brokerage information, property details, and service claims. Before publishing, check that the surrounding copy is accurate, current, and consistent with the brokerage’s requirements.
In British Columbia, real estate advertising must clearly identify the applicable brokerage when a licensee is being promoted. The Real Estate Services Rules provide the governing wording and presentation requirements, so realtors should confirm current obligations with their brokerage or regulator before finalizing campaign materials.
Also review images for privacy and permissions. Do not show clients, children, confidential paperwork, access codes, or identifiable private information without appropriate consent. If a branding session takes place at a listing, confirm that the location and any people appearing in the frame may be photographed for marketing.
How can you use the images after the session?
Start with the highest-priority places rather than trying to publish everything at once. Update your professional profile, website biography, email signature, listing presentation, and social profiles first; then build recurring content from the remaining lifestyle and work-in-action images.
- Website: use a clear portrait and a wider image with space for text.
- Listing presentations: choose confident, relevant images that support your expertise without distracting from the property information.
- Social posts: pair a portrait or local scene with a useful explanation, market observation, or client question.
- Email marketing: use horizontal crops for introductions, newsletters, and seasonal messages.
- Short videos: combine movement clips with captions, narration, or property footage when appropriate.
Organize the final files by orientation and purpose, then record where each image has been used. This makes it easier to avoid repeating the same portrait across every channel and helps identify which visual types you need at the next session.
When should you refresh realtor branding photos?
Refresh the library when your appearance, brokerage, service area, positioning, or visual style changes. A new session is also useful when the existing images no longer reflect the way you meet clients or the platforms where you publish.
Instead of waiting until every image feels outdated, review the library periodically. Replace images that no longer represent you, keep versatile portraits that still work, and plan the next session around the gaps. Seasonal updates can be smaller and more focused if the core library remains current.

How do you choose a photographer for realtor branding photos?
Review whether the photographer can create more than polished headshots. Look for evidence of consistent lighting, natural expressions, environmental portraits, work-in-action scenes, and images composed for different marketing formats.
Ask how the planning process works, what you need to prepare, how locations are selected, what file formats are delivered, and whether video can be added when it supports your goals. A useful photographer should be able to explain how the images will function across your website, social channels, presentations, and other materials.
You can review the Silver Valley Studios portfolio for examples of visual storytelling across people, spaces, and business settings. The aim is to find a visual approach that feels credible for your practice rather than copying another agent’s style.
Realtor branding photos checklist
Use this checklist before confirming your session:
- Write down your audience, service area, and the impression you want to create.
- List the website, social, presentation, email, and print uses you need to support.
- Choose two or three realistic locations with an indoor backup.
- Prepare coordinated outfits, comfortable shoes, simple accessories, and a steamer.
- Bring a small number of meaningful props, with all private information removed.
- Request a mix of headshots, lifestyle portraits, environmental images, and details.
- Discuss vertical, horizontal, and text-friendly compositions before shooting.
- Confirm permissions for locations and anyone who may appear in the images.
- Plan how the final files will be named, stored, cropped, and reused.
Frequently Asked Questions
How many images should a realtor request from a branding session?
There is no universal number because the right quantity depends on your channels, posting frequency, and required variety. A useful library should include multiple expressions, orientations, locations, distances, and activities rather than many nearly identical portraits.
What should I wear for realtor branding photos?
Bring several coordinated looks, such as business formal, smart casual, and seasonally appropriate outerwear. Choose colours and textures that fit your professional identity, avoid distracting patterns and large logos, and bring items that remain comfortable while walking or working.
Should realtor branding photos include video?
Short video can be useful when you plan to publish social content or combine personal introductions with property footage. Request simple movement and detail clips - such as walking, greeting, reviewing notes, or opening a door - that can be edited with captions or narration.
How can Maple Ridge realtors prepare for an outdoor branding session?
Choose locations that are genuinely connected to your service area and confirm access, parking, noise, and permission requirements. Keep an indoor backup for changing weather, and plan wardrobe layers so the session remains comfortable through changing light and temperature.
Plan your realtor branding session
Strong realtor branding photos begin with a clear message and a practical shot list. Silver Valley Studios Inc. helps Maple Ridge and regional realtors plan locations, wardrobe, photography, and complementary video so the final visuals work across everyday marketing.
Review the real estate media and branding services to see how a session can fit your current content needs, then prepare the checklist above for a focused planning conversation.